Creating data with consequence for CSDP
This document contains the latest process to data consequence to the building structures and road polygons.
For buildings
Creating the file for performing a spatial join
- Get the GML files from the USGS website.
- Load the
boundingPolygon.kmlfrom the package that Dick had sent. - Export it as a GeoJSON file while choosing the extent as the
boundingPolygon.kml.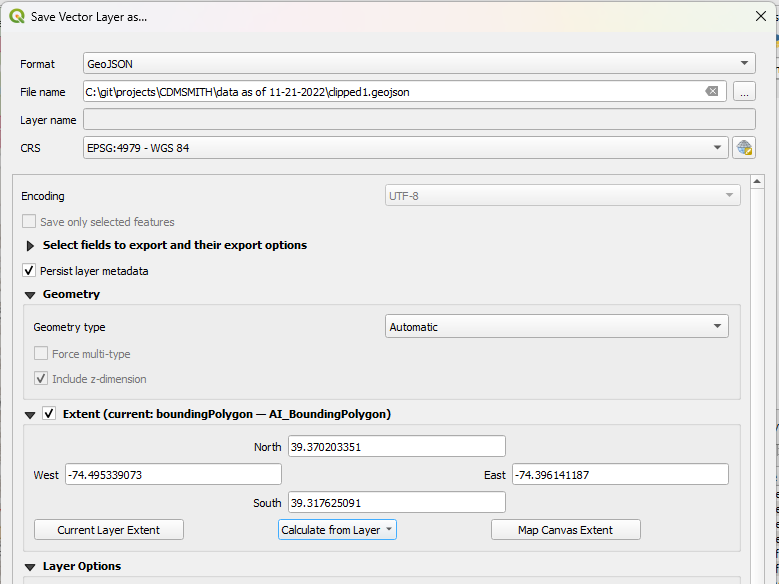
- Repeat this same process in QGIS for all the GML files which lie inside Dick's bounding box.
- Once, all the GML files which lie inside Dick's bounding box are clipped, we then merge them.
- To merge them use the
Merge Vector Layersfrom theProcessing Toolbox. - Select the clipped layers and then click on Save.
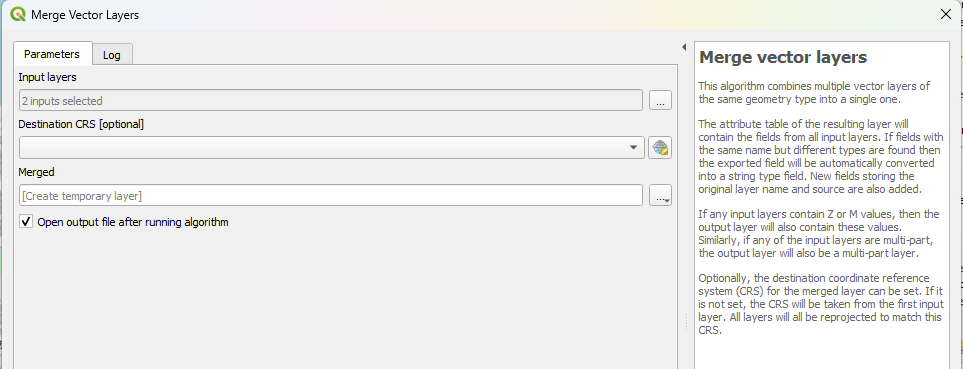
- Once you have the merged layer, you need to click on
Fix Geometriesfrom theProcessing Toolboxon them.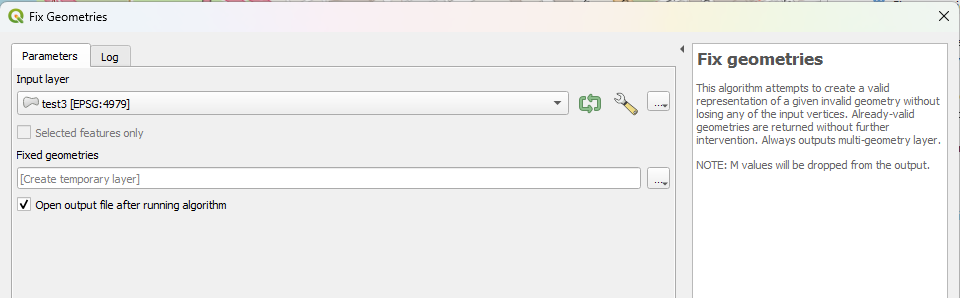
- This will be the file that you will use to perform the spatial join with the pushpins.
- Export this file as a
GeoJSONfile.
Performing the spatial join
- Load the
GeoJSONfile in QGIS. - Load the consequence pushpins from Dick. Load the file as a Delimited Text Layer.
- To perform a spatial join, in the
Processing Toolbox, typeJoin Attributes by Location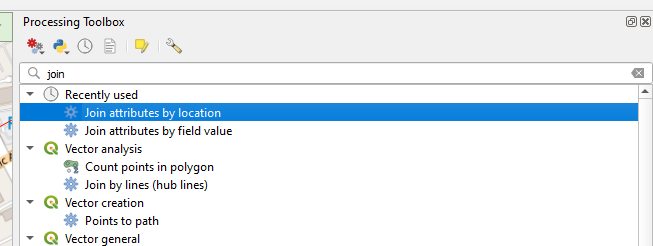
- Make the Merged Layer with fixed geometry as the Base Layer
- Make the Structure Consequences as the
Join Layer - Choose
intersectsas the Geometric predicate.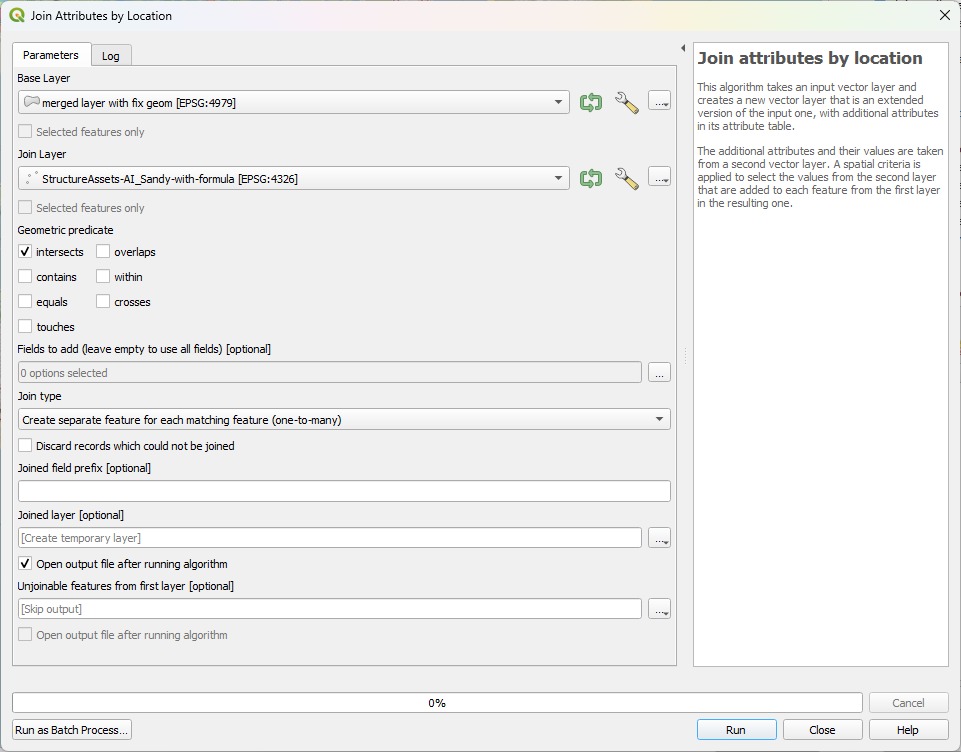
- Then click on Run.
- Save this joined layer as a GeoJSON file
- Right click on the
Joined Layerand click on export. - Export the file as a
PostgreSQL SQL dump. - While exporting, set
CREATE_SCHEMAas NO.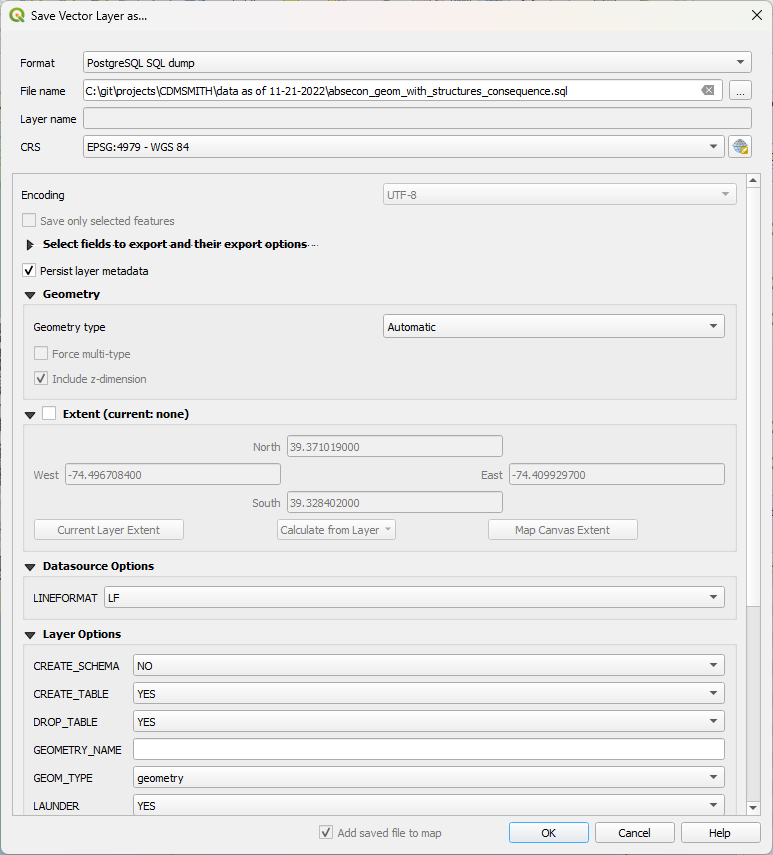
- You now have the SQL dump ready for the next steps.
Migrate the SQL Dump to PostgreSQL
Note: These steps are taken from the How to add consequence data to 3DCity DB file
- Open PG Admin.
- Select Tools > Query Tool.
- lick the open file icon, navigate to the SQL dump, and open the file.
- Highlight the first few rows, up to and including the CREATE TABLE statement.
- Press the run icon (or press F5) to run these highlighted rows.
- Delete the highlighted rows.
- With nothing highlighted, press the run icon (or press F5) to run the rest of the dump import.
- You now have the tables ready for running the aggregate queries.
Perform aggregate queries
- Run these queries in the following sequence.
- blah
- blah
- Export the csv out. This will be the
damages.csv
Updating the heights of the building structures
- Get the LAZ files from the blah blah location
- foo1
- foo2
- Generate the
new_heights.csv
Adding the consequence data in the CityGML file
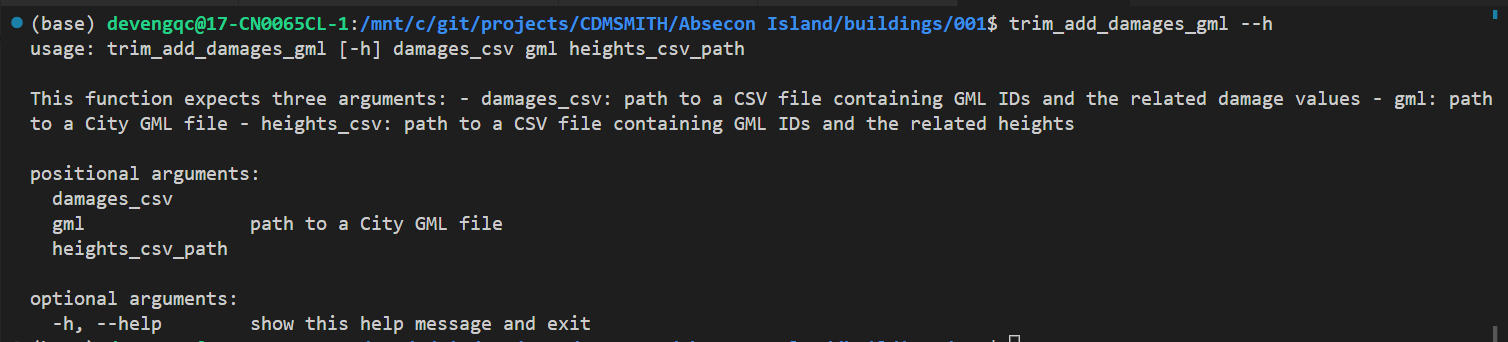
- Run the Python CLI with with the following arguments.
For roads
Adding consequence to the road polygons.
Buffering road centerlines
The document can be found here.
Remaining process
The document for the remaining process can be found here.
Chopping up road polygons
Done by Vannary in FME
Chopping
Adding the id column (NSI Identifier)
Adding the centroid of the polygons
Export
- The files are exported as a
GeoJSONandcsvfile
Updating the consequences of road polygons
Dick occassionally sends the updated consquences for Roads and building structures.
Adding the new column
- From the discussions during the meeting, addition of a new column was proposed.
water_level_above_ground_wpandwater_level_above_ground_wop
- These columns are calculated using the following formula.
water_level_above_ground_wp (ft) = flooding_damage_driving_param_wp (ft) + foundation_height (ft)
water_level_above_ground_wop (ft) = flooding_damage_driving_param_wop (ft) + foundation_height (ft) - If the sum of the values is less than zero, the value is set as zero. Else, it is kept as is.
- This process is done manually in Excel and then the
xlsxandcsvare saved. - We save the
csvwith the following suffixwith-formula.csv
Join my attribute in FME
- We take the road polygons (GeoJSON) and the
csvwith the new column. - We use the
AttributeJoinerto join the two on thensi_identifiercolumn. - Then we extrude the output of the join using the
Extruder. - The
Extruderreturns a3d-tilesetwhich is then uploaded on Cesium Ion.