3DSlicer
1. Installation
- Download 3D Slicer: Visit the official3D Slicer website and download the latest version compatible with your operating system (Windows, macOS, or Linux).
- Install the Software: Follow the installation instructions for your specific operating system.
2. Familiarization with the Segment Editor
Steps:
- Open 3D Slicer: Launch the 3D Slicer application.
- Load Data: Click on the ‘Add Data’ button to load your MRI dataset into the software.
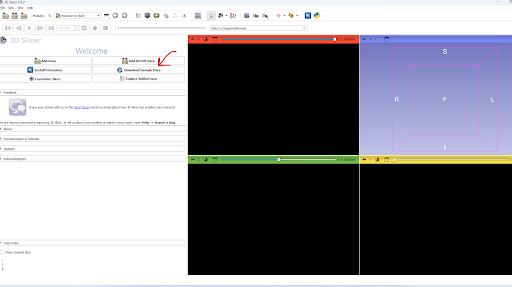
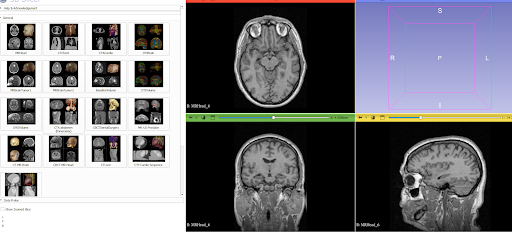
Access free sample data
Or you can access our own file using import dicom file
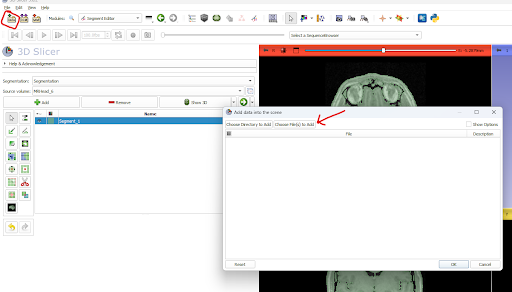
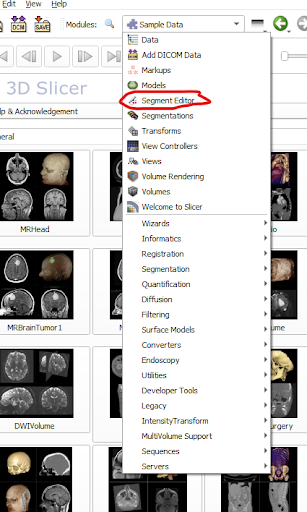
- Access Segment Editor: Navigate to the ‘Segment Editor’ module located under the ‘Modules’ dropdown menu.
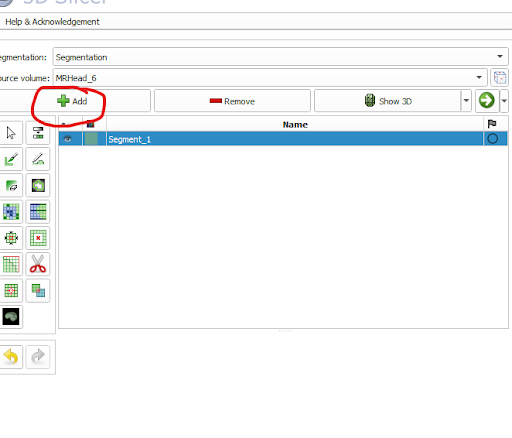
- Create a New Segmentation: Click on the ‘Add’ button to create a new segmentation. Assign a name and select the MRI volume to segment.
3.Apply Thresholding
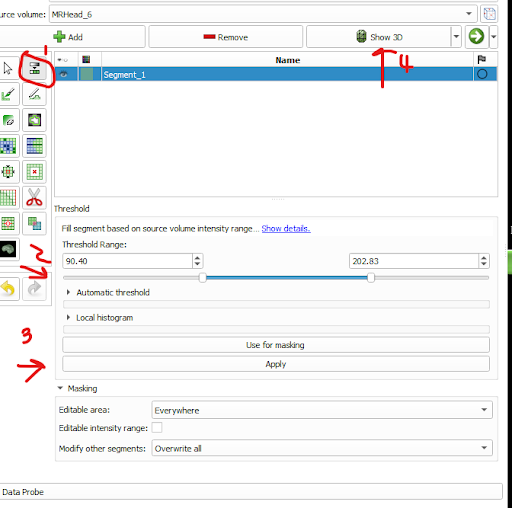
Select the Threshold Tool: In the Segment Editor, choose the ‘Threshold’ tool from the effect list.
Adjust Threshold Range: Use the sliders or input boxes to set the minimum and maximum intensity values for your threshold. Voxels within this range will be included in the segment.
- Manual Adjustment: Drag the sliders to adjust the threshold range manually.
- Automatic Adjustment: Use the ‘Auto’ button to automatically determine a suitable threshold range based on the image histogram.
press show 3d to render a 3D model
4. Refinement using the Scissoring Tool
The Scissoring Tool helps in refining the segmented images by removing unwanted parts.
Steps:
- Select the Scissoring Tool: Choose the ‘Scissors’ tool from the effect list in the Segment Editor.

- Configure Scissoring Options: Adjust the settings, such as the shape of the cutting region (freeform, rectangular, circular) and the operation mode (erase inside, erase outside).
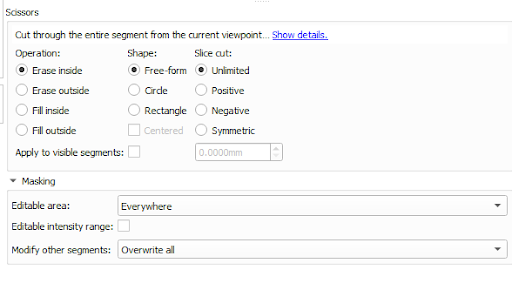
- Apply the Tool: Use the mouse to draw the scissor path over the segmented area. The unwanted parts will be removed based on your configuration.
- Review Changes: Inspect the changes made by the scissoring tool and ensure the segmentation is as desired.
5. Saving and Exporting
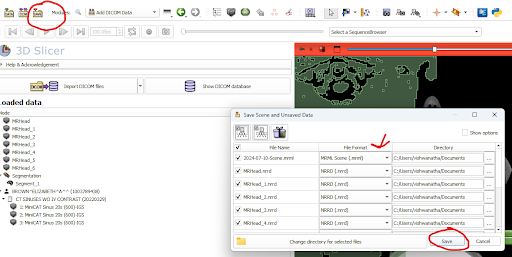
Save Segmentation: Once satisfied with the segmentation, click on the ‘Save’ button. Ensure to save both the scene and the segmented images.